


How To Install 3-Pin CPU Fan Assembly
Upgrading and cooling your CPU with a new fan tower assembly at heatsink will better ensure it's longevity. Cooler Master Hyper 3-Pin CPU Fan and tower are equipped with all of the components needed to complete this project. What this article will cover is listing out the required components and tools, how to attach to the motherboard over the CPU and between the heatsink. You will appreciate the completion of your CPU cooler project and the upgraded performance the fan and tower will provide.
What are the Components?
When purchasing a CPU Cooler such as the Cooler Master Hyper 212 Evo, it is good to lay out each component and check with with the supplied manual that each is included:
Install Manual: This multi-page document will show what components are included in the packaging as well as provide illustrations on how to put the components together. Refer to the manual when you're in need of help with the installation.
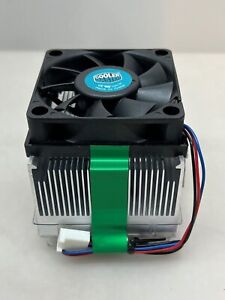
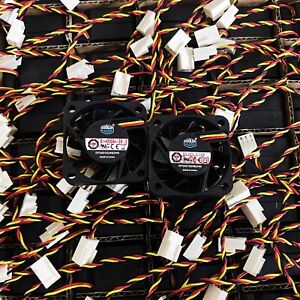
CPU Fan: This PWM fan is a 3-pin fan with an aerodynamic fan blade design. The chassis has integrated clips to attach directly to the heat sink. Dimensions are 120 mm x 120 mm x 25 mm.
Cooling Tower: This CPU cooler tower comes with 4 heatpipes made of copper and aluminum fins for heat distribution.
- Mounting Components: This includes a base plate (mounted to the underside of the mother board). CPU bracket that connects the heat sink tower to the mother board. The mounting components also include 4 threaded standoff and nuts with a Phillips head screw adapter used to secure the standoffs. What also comes with the mounting set are rubber anti-vibration pads.Lastly, included is Cooler Master Thermal Paste.
- Components for a second cooling fan assembly. This includes additional brackets with screws. There's also additional rubber vibration pads. For socket style motherboards, there's a set of screws.
Installing the Cooler Master CPU Cooler:
Mount the Brackets to the Motherboard: Start by adding the standoffs to the motherboard where the CPU Cooler will be placed. Mount the mounting bracket and tighten down with nuts. Refer to Install manual for a visual of the components.
Before mounting the tower: Clean any fingerprints and smudges off CPU with an alcohol based solution. Next, add a thermal surface compound for adhesion to the top side of the CPU surface.
Install Cooling Tower: First remove the plastic cover by the copper heatpipes before installing the cooling tower over the CPU and inside heatsink. Gently secure cooling tower down using the CPU Bracket and screws in a crisscross pattern, suggested by the manufacturer. Once cooling tower is level, tighten screws.
Install Fan: Plug in fan to motherboard and clip fan assembly clipped on to cooling tower.
Content provided for informational purposes only. eBay is not affiliated with or endorsed by Cooler Master.